
You Light Up My Life

Lola Floral was participating in the Woodinville Weddings Event and the planner she was working with found the image of this Lamp Sign online somewhere and wanted it for the show, but could not find it to buy anywhere. "No problem", I said, I got you covered.
More is always better
I figured if I was going to to make ONE of these, they were SO COOL, I might as well get enough supplies to make a few. So, I headed to Lowe's and purchased the materials.

I also had the great idea while I was there to make the Lamp actually WORK! So, I also grabbed some electrical wire, caps and plugs to make it happen.
The Woodwork
I put Madisyn down for a nap, and headed into the garage (with the monitor on, of course). I had picked out two reclaimed wood boards I knew I wanted to use, and I also had bought 2 new pine wood boards to use to make 4 total. I measured each board and divided that number by 4 so I knew how long to cut each of the 4 sections that would go together to make the sign.
- I cut each section by setting the 1st cut on top of the board I was cutting. I lined the Chop Saw Blade up with the edge of the first cut, that way there is less measuring involved (I hate measuring) and each board ends up pretty darn close to the same length because you are using the board itself to measure.
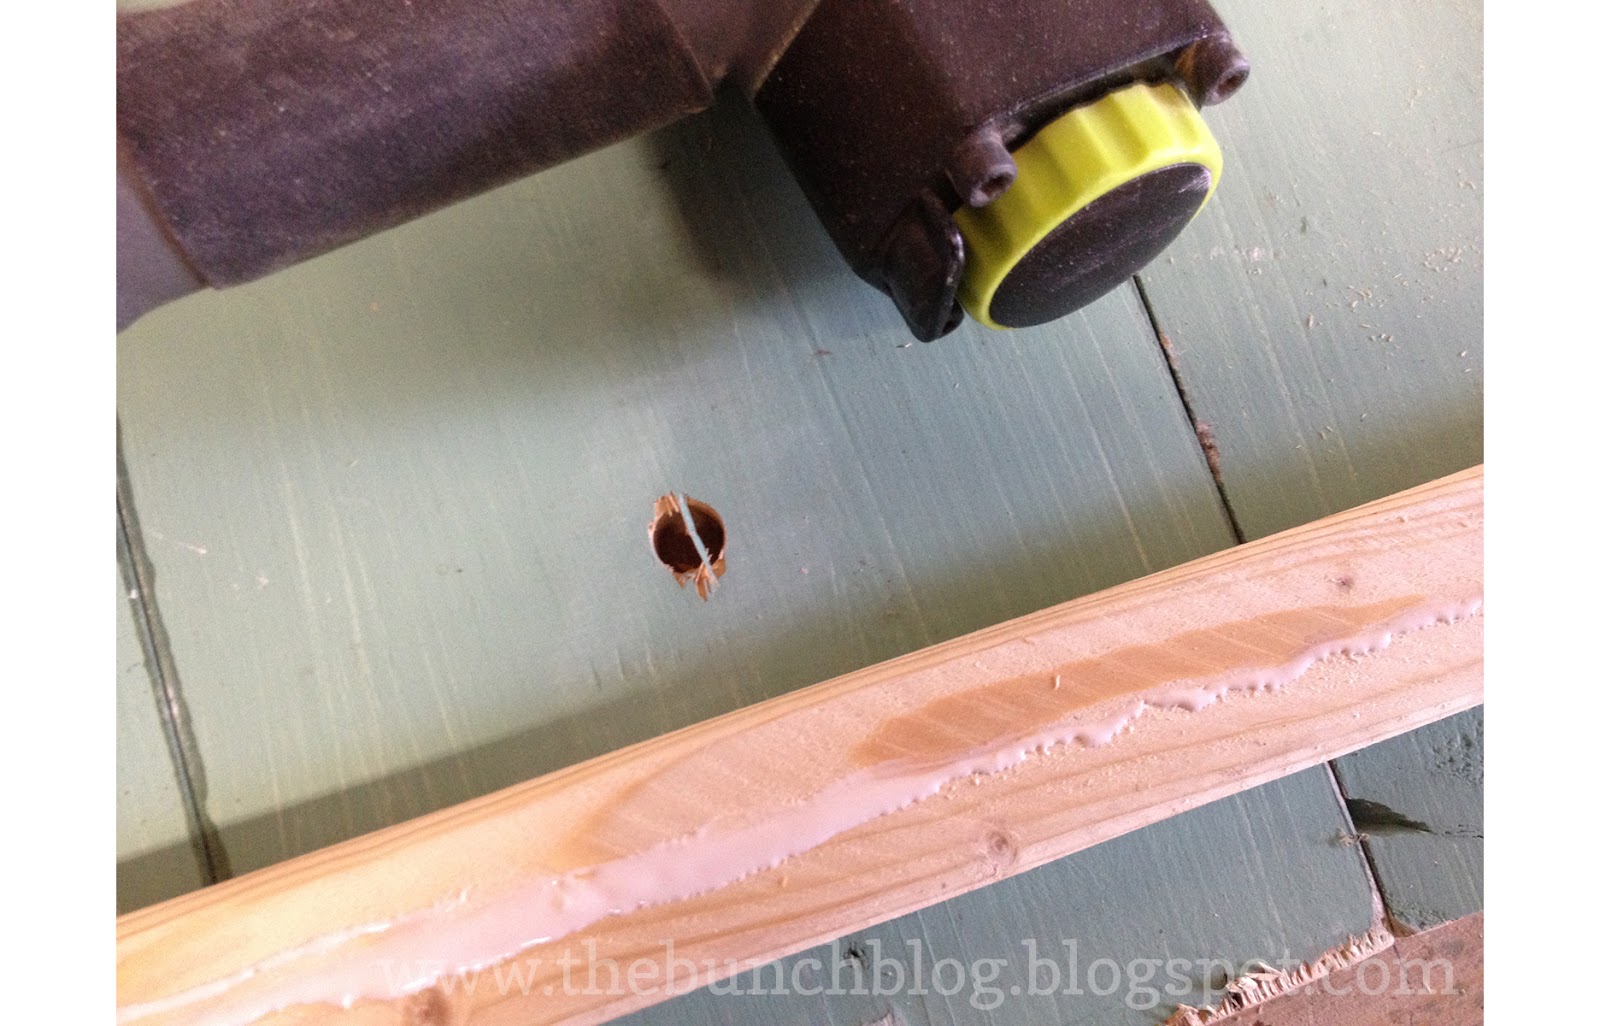
- After I had all 4 boards the same length, I used my Black and Decker Mouse Sander (which I love), to smooth all the edges. I wanted these signs to have a rustic look, so even though this was a reclaimed board that had been painted green, It was ok with me for some of the natural wood to show through, it just enhanced the rustic look I was going for.
- Then, I laid out my lamp fixture to see where I wanted it to line up on the sign.

- I marked on the board where I liked the light fixture (distance from the edge of the board) with a light pencil mark. Then, measured in from each side of the board to find the middle. This is where I drilled my hole for the electrical cord to come through. I used a 3/4 inch bit because I knew it would create a hole large enough for the cord to easily slip through. *Its important to drill this hole before you secure all 4 boards together with the "nailer board" on back so you can make sure you get it placed where you want it, without having to work around the "nailer board"*
- See those rough edges the drill created? No problem, just sand them off.

- Next I laid out my boards face down (the side that will be the sign face is down on my work bench) and cut some scrap 1x2 long enough to secure all 4 boards together. Before securing them together I made sure all the ends lined up straight.

- I spread a generous amount of Gorilla Glue wood glue on one side of the "nailer board" and turned the glue side down onto the back sides of my sign boards. To make sure it is secure, I finished them off with my Craftsman Finish Nailer.
- And voila'- you have the Woodwork part of your sign complete!

Wiring
Next I tackled the wiring. The lamp I chose was meant to be an outdoor light fixture- the kind you put next to your garage door. It was under $5 and I LOVE the rustic mason jar look it has. Because it is meant to be hard wired into a wall, we had to alter the wiring so that it could be plugged into a wall. I asked my husband to work on this with me, just to make sure I was doing it correctly.
Materials:

- 14/3 SJO Electrical Cable (I used a 5 foot section for each wall hanging so there is enough wire to hang it above a power outlet and it reach comfortably)
- Wire Strippers
- Wire Connectors
- Electrical Plug
First off- I unscrewed the Electrical plug and took it apart so I could connect one end of the wire to it. To expose the wires inside the insulation, I stripped the plastic off the wire using my wire strippers.
*Here is a simple YouTube Video on using wire strippers in case you need to learn*
After I exposed the 2 wires and the ground inside the insulation, I then stripped each wire of its coating using the wire strippers as well.

I then took each exposed wire and connected them inside the plug. White goes to the ground. Green to negative and black to positive. I tightened each screw against the wire and then pulled the plug cover back over the top and screwed that back together. This completes the PLUG side of the cord.
I cut my cord to about a 5 foot length, and slid the cord through the hole on my sign so that the plug came out the back of the sign.
On the other side, I stripped the wires just as before and matched each color wire to its corresponding wire on the light fixture itself. I used the wire caps to connect the wires and ground, just by twisting till it was tight.

I tucked all the caps and the wires behind the cover of the fixture and screwed the fixture onto the board! All that was left was a light bulb and the Mason Jar and the wiring was complete.

Vinyl Time
There are some simple steps to follow to effectively apply vinyl to a surface. I've been using vinyl for a long time now, and forgot that there once was a learning curve. I was reminded at the Valentine's Day Pinterest Party that some people have never worked with it before, and even if they have- they might not know the tricks and tips I've learned over the years to make it as "stuck to itself proof" as possible. You are in luck- I will share them with you HERE!
- I use my Silhouette Cutting Machine to cut my vinyl. Once its cut, peel the negative space away from the lettering and discard ***BE VERY CAREFUL- if the piece is large, the parts you've peeled off could stick back to the part you are still peeling and ruin the whole cut- this always makes me want to scream and cry***
- I cut each word section apart from the other and lay it out on my sign to make sure I like how it looks before moving any further. ***Now is the time to make changes, cause once the vinyl is stuck, its stuck!****
- Next is applying transfer paper to your vinyl. I had no idea, that some people either didn't know about transfer paper, or actually CHOOSE NOT TO USE IT?! This is crazy to me! If you have an intricate design, it would be absurd to hand apply each little sticker?! Well, some people are doing it, I don't recommend it. I recommend transfer paper! You can purchase it at Silhouette's Online Shop if you'd like to give it a try!
- A trick I've learned in working with transfer paper alone is to stick it to a clean, dry surface- then pull on the roll to unravel it to the size you need to cover over your design. Then its easy to cut without it getting stuck to itself *** Which also makes me want to cry when it happens (often).***
- Once its cut, lay it over your design- starting in one corner and gently push towards the other till it is all stuck. Use a credit card to push out any air bubbles and make sure every little centimeter is stuck properly.

- Next, un-stick the transfer paper from your surface (leaving your vinyl design and paper backing attached). Turn the design over on your surface so that the non sticky side of the transfer paper is on the table. Carefully peel the paper backing away from the vinyl. The non sticky side of the vinyl will stick to the transfer paper, exposing the sticky side of the vinyl.
- Carefully apply your vinyl sticker to your sign- working from one corner slowly to the other just like you did the transfer paper. Sometimes it helps to trim all excess transfer paper away from the vinyl so you can see your design better when applying it, making sure it goes exactly where you want it. ***Because once its stuck, its stuck- if you don't like it, you have to peel it off and its garbage.***
- Use your credit card again to smooth out your vinyl- sometimes air bubbles get caught underneath it and they can be smoothed out with the pressure from the card.
- Once its all smooth, slowly peel away the transfer paper from the wood making sure that the design is sticking. ***Sometimes you will need to give certain parts an extra rub with the credit card as you are peeling away the transfer paper to get the vinyl really stuck.***
- I did this for each of my word sections on the sign and it was complete!

Here is my project complete- I had too high Watt light bulb in it when I took the photos- so when its on, its REALLY bright- but you get the idea. I love it and hope you do too!

- Use more than one skill or technique in your next project (such as wiring, and woodworking)- its really satisfying to use more than one of your many skills in one project!
- Attempt your first project with vinyl*** and PLEASE, use transfer paper!***
- Or, make this! (If you love it, but don't want to or feel you can't make it- you are in luck- you can find some available in the bunch's Etsy store!)


That is so amazing! I want to make one, too! Found you through Sawdust Girl's Sawdust Throwdown...
ReplyDeleteCher @ Designs by Studio C
http://designsbystudioc.com
designsbystudioc@gmail.com
Thanks so much Cher! So glad you liked my project and I hope that you get to make one!
Delete-Tracie